
A commuter bike is most likely to let its rider down on an ordinary workday: a late start, a loaded bag, rough streets, and no time for surprises. That is why a basic inspection is not a hobbyist ritual. Major bike brands tell riders to perform a pre-ride safety check, and those checks matter even more when a bike is used almost every day. The goal is not cosmetic perfection. It is catching the small, easy-to-miss problems that end commutes: underinflated tires, weak brakes, a loose wheel, a dry chain, or a rack bolt backing out next to a spinning wheel. (media.trekbikes.com)
Use the 90-second Doorway Check before every commute
The simplest system is the one that actually happens on busy mornings. A useful routine is a short doorway check done before leaving the garage, hallway, or bike room. It is less about precision than about pattern recognition: does anything feel softer, looser, noisier, or more crooked than it did yesterday? If so, stop long enough to identify the cause. Manufacturers build their own pre-ride checklists around this same logic. (media.trekbikes.com)
- Roll: Walk the bike forward a few feet. Listen for brake rub, feel for a dragging wheel, and glance at the tires for obvious softness or damage. (media.trekbikes.com)
- Squeeze: Pull both brake levers firmly while standing still. You should be able to apply full braking force without the lever touching the handlebar. (media.trekbikes.com)
- Spin: Spin each wheel. It should run through the frame or fork without major wobble and without catching pads, rotors, fenders, or accessories. Confirm that the quick-release or axle is fully secured. (media.trekbikes.com)
- Wiggle: Check the bar, stem, saddle, pedals, and crank for looseness. If something moves that should not move, the ride can wait. (media.trekbikes.com)
- Shine and shift: Turn on the front and rear lights, confirm they work, and run through a few gears or at least confirm that the drivetrain shifts smoothly and keeps the chain in place. (media.trekbikes.com)
A realistic example: imagine a commuter who changed a tube the night before. In the morning, the bike looks ready, but the rear wheel was not fully secured and the rotor now rubs. That is exactly the kind of problem this quick sweep is meant to catch. Many dangerous bike issues are not dramatic failures. They are ordinary assembly mistakes or wear signals discovered one minute too late, in traffic instead of at the doorway. (media.trekbikes.com)
A simple decision table: ride, schedule, or stop
| System | Ride today if… | Schedule service soon if… | Do not ride until fixed |
|---|---|---|---|
| Tires | Pressure is in range and the tread has no deep cuts. | You are seeing recurring embedded debris, a slow leak, or a tire that is wearing noticeably thin. | Pressure is below minimum or above maximum, a cut reaches the casing, or casing threads are visible. (media.trekbikes.com) |
| Brakes | Levers feel firm and the bike stops cleanly at low speed. | There is minor noise, light rub, or early pad wear you can monitor closely. | A lever reaches the bar, braking is weak or inconsistent, pads or rotor are below the maker’s limit, or a rotor is cracked or deformed. (media.trekbikes.com) |
| Wheel attachment | The wheel is fully seated and the quick-release or axle is fully secure. | There is a small wobble or spoke noise that is not worsening. | The wheel is loose, not fully seated, or the attachment hardware cannot be secured correctly. (media.trekbikes.com) |
| Drivetrain | The chain is quiet enough, intact, and shifts smoothly. | The chain is dry, dirty, or approaching replacement wear, or shifting has become slightly hesitant. | There is a broken or stiff link, serious skipping, repeated chain drop, or a loose or grinding crank. (giant-bicycles.com) |
| Cockpit, lights, and accessories | The bar is straight, cables move freely, and lights, racks, fenders, and bags are secure. | A light battery is low or an accessory bolt needs tightening later that day. | The bar twists, cables snag, a rack or fender can contact the wheel, or lights are not working for a low-light commute. (media.trekbikes.com) |
The most useful habit here is separating annoyances from no-ride faults. A dry chain or a slightly low light battery may mean service tonight. A loose wheel, failing brake, or cut tire means the commute needs a different plan. Daily riders often blur that line because the destination feels urgent. Mechanically, that is when preventable problems become expensive or dangerous. (media.trekbikes.com)
Tires deserve first attention because they cause the most commute-ending problems
Start with pressure, but do it accurately. Trek’s guidance is to use a pump with a gauge and keep the tire within the recommended pressure range. If both tire and rim list limits, the lower limit governs. Trek also warns against exceeding the maximum pressure and against riding below the minimum pressure marked on the sidewall; both conditions can damage the tire or rim and can lead to loss of control. A hand or floor pump is preferable to a gas-station compressor, which is easier to overdo. (media.trekbikes.com)
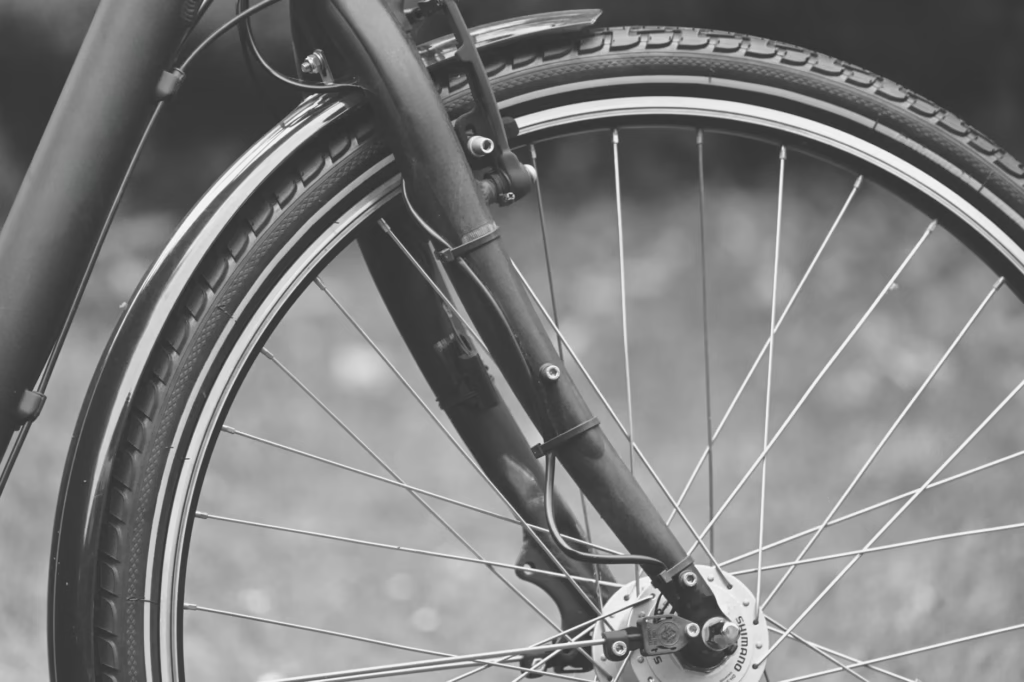
Pressure is only half the check. Inspect the tread and sidewalls. Trek says to replace a tire if a cut goes all the way through the casing or if casing threads show through the tread. Giant also advises removing foreign objects from the tire surface and changing the tire if you see a significant cut. That matters for commuters because urban debris often causes repeat flats long before the tire looks completely worn out from a distance. (media.trekbikes.com)
One useful commuter practice is keeping a small pressure log for each season. Not a spreadsheet, just a remembered baseline: what feels right on dry pavement, what feels harsh on winter-cracked streets, and what your tires lose overnight if a slow leak is developing. The point is not chasing a perfect number every day. It is noticing when today’s tire feels meaningfully different from normal before it goes flat halfway to work. (media.trekbikes.com)
Brake checks need both a function test and a wear check
Many riders stop at the lever squeeze, but commuting asks more from brakes than that. Trek’s pre-ride checklist says you should be able to apply full braking force without the lever touching the handlebar, then confirm at low speed that each brake stops the bike properly. That second step matters because a brake can feel present at the lever and still perform badly under actual rolling load. Trek also notes that grip is greatly reduced in wet or snowy weather and braking distances increase, which makes weak brakes even more of a commuter problem. (media.trekbikes.com)
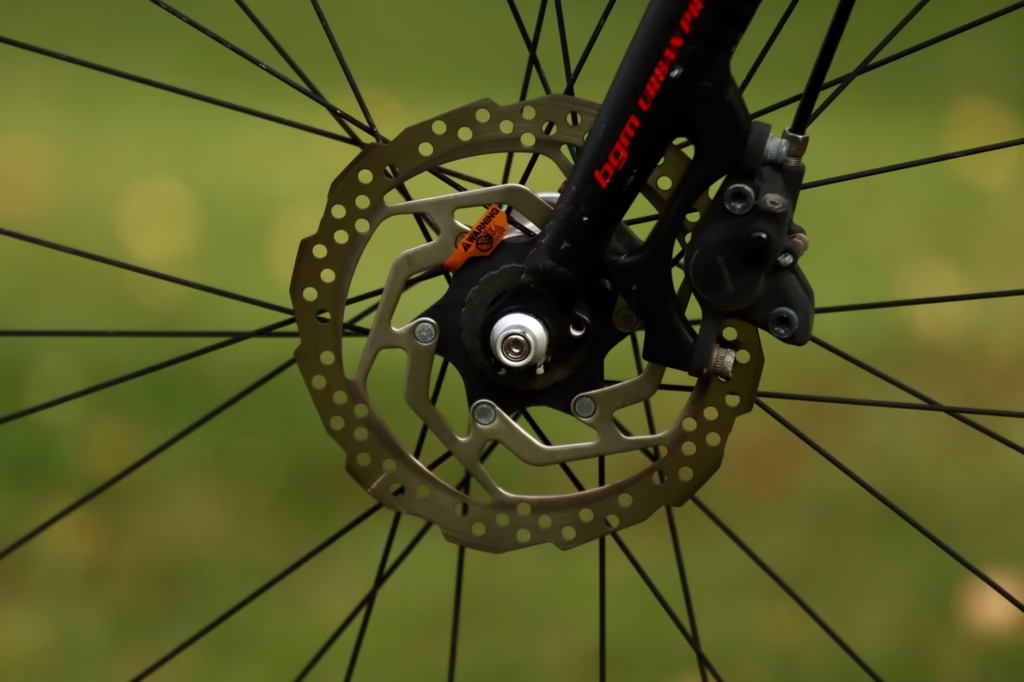
After the function test, look for wear. Here the right rule is to follow your specific component maker, because limits vary. Trek’s current owner manual says rim-brake pads should be replaced if the grooves are less than 2 mm deep, or 1 mm for direct-pull brakes, and says disc pads should be replaced when they are thinner than 1 mm. Shimano’s hydraulic disc brake user manual warns not to use pads that are 0.5 mm or less and says a rotor should be replaced if it is cracked, deformed, or 1.5 mm or less thick. The practical takeaway is simple: brake wear has published limits, so guessing is unnecessary. (media.trekbikes.com)
Commuters who lube their own chains should also think about brake contamination. Shimano warns that oil or grease on a disc rotor or brake pads can prevent the brakes from working correctly; its guidance is to wipe oil or grease from the rotor and replace contaminated pads. This is one of the most common self-inflicted maintenance mistakes: the drivetrain gets quieter and the braking gets mysteriously worse. When that happens right after lubrication, contamination should be high on the suspect list. (si.shimano.com)
If braking feels weak after chain lube, a lever pulls to the bar, or a rotor is cracked, warped, or below the specified minimum, do not treat it as a ride-and-see issue. Skip the commute and fix it first. (media.trekbikes.com)
Wheels, lights, racks, and fenders are where commuter bikes become different
A wheel attachment check is not optional. Trek says axles must be fully seated in the dropouts, quick-releases must be correctly closed, and thru-axles must be fully secured and compatible with the frame, fork, and hub. Trek also notes that correctly clamping a quick-release takes meaningful force, and its manual describes a properly adjusted lever as one that closes firmly enough to leave an imprint in your palm. Giant gives the same basic warning: wheel-retention systems are easy to use, but they still need to be tight and secure. (media.trekbikes.com)
Then spin the wheel and watch its path. It should run straight through the fork or frame and not contact pads or other parts. Trek’s manual also advises replacing or fixing loose or damaged spokes, watching for rim-wear indicators on rim-brake wheels, and taking bearing problems to a shop if a hub feels loose or makes a grinding noise. That is useful commuter judgment: some wheel issues are tune-up items, but hub play and structural wear are not casual weekday compromises. (media.trekbikes.com)
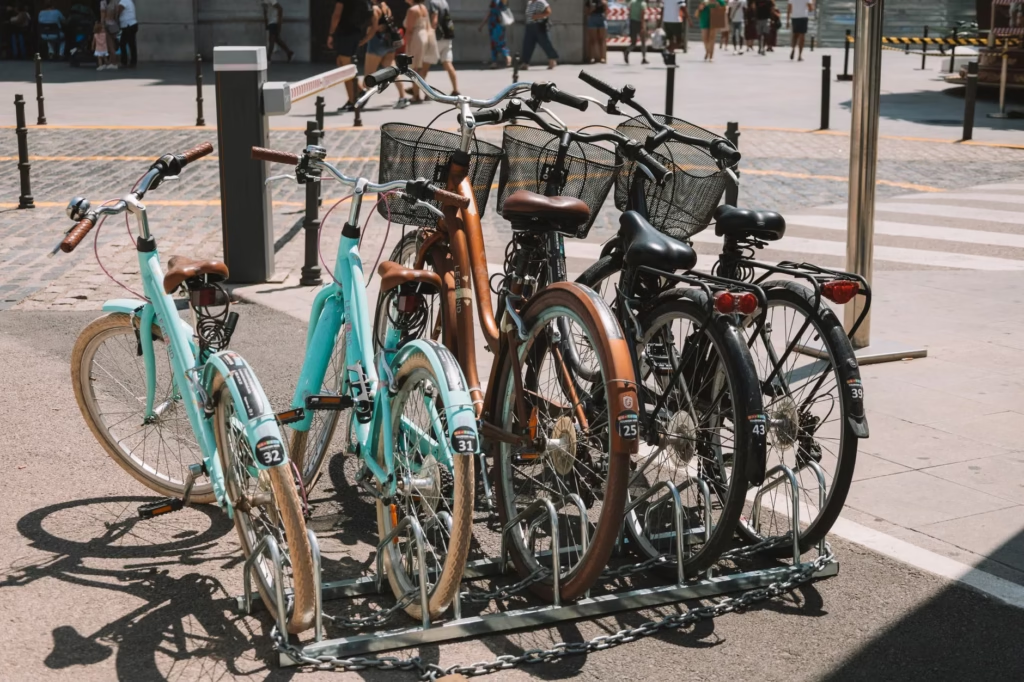
Commuter bikes also carry more hardware than many weekend bikes: racks, fenders, lights, bags, child-seat mounts, locks, and sometimes e-bike batteries. Trek specifically warns riders to check that accessories and the fasteners used to attach them are securely mounted before every ride, and it says front and rear lights should be secure, working properly, and backed by charged batteries. Trek also notes that reflectors are not a substitute for lights. For a daily commuter, this section deserves special attention because extra accessories create extra opportunities for rattles, rubbing, and wheel interference. (media.trekbikes.com)
A quiet drivetrain usually means lower cost later
Drivetrain care is where many commuters either overdo it or ignore it. The middle ground is better. Giant recommends wiping the chain with a clean rag and applying lubricant as needed, while also warning not to use too much lube because extra lubricant attracts dirt. Trek likewise advises routine cleaning and lists degreasing and lubricating the chain as one of the easy fixes riders should know. Trek also warns against spraying pressurized water directly at bearing points or e-bike electrical parts. A quick wipe and sensible lubrication are far better than neglect, and also safer than blasting grime deeper into the bike. (giant-bicycles.com)
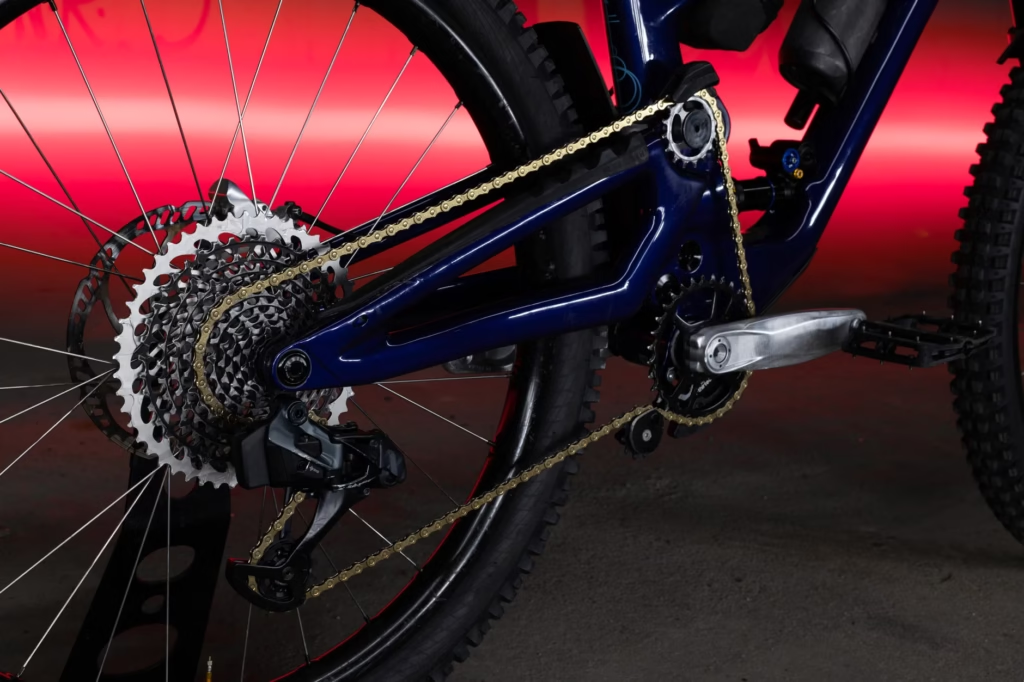
Inspection matters as much as cleaning. Trek’s pre-ride checklist says to look for chain kinks, rust, broken pins, plates, or rollers. On bikes that use an adjustable chain or belt tension rather than a derailleur to manage slack, Trek gives a reference of 6 to 12 mm of total vertical movement at the middle of the chain and advises checking with a shop if you are unsure of correct tension. For derailleur-equipped bikes, the more useful daily signs are stiff links, rust, grinding noise, skipping under load, or a sudden drop in shift quality. (media.trekbikes.com)
If the bike sees heavy daily mileage, add a chain-wear check to the routine. SRAM’s user manual says to replace the chain at 0.8 percent elongation to maintain performance and limit wear to the cassette and chainring. Shimano’s chain guidance likewise tells riders and mechanics to check whether a chain has become stretched or damaged, warning that a worn chain may break and cause a fall. The precise replacement threshold can vary by drivetrain, but the important lesson is universal: chains are consumable parts, and replacing one on time is usually cheaper than replacing the whole drivetrain late. (sram.com)
Finish with a shift test. Trek recommends shifting through all sprocket combinations to make sure the derailleurs operate correctly and smoothly and that the chain does not come off. For commuters, that check is especially useful after parking in tight bike rooms, lifting the bike onto transit racks, or any situation where the rear derailleur might have been bumped. Poor shifting is not just annoying; it often signals wear or misalignment that will get more expensive if ignored. (media.trekbikes.com)
Do not ignore the parts your hands and feet control
The cockpit check is basic but high consequence. Trek says the handlebar should sit at 90 degrees to the wheel, should not twist in the stem, and should turn side to side without pulling or catching cables. Trek also says stem bolts should be checked against the correct torque specification, which is often printed on the part, while Giant warns that a loose stem bolt can cause loss of control and a loose saddle clamp can let the saddle slip unexpectedly. The commuter version of this check is simple: if the bike was leaned, knocked, or carried awkwardly, verify alignment before rolling away. (media.trekbikes.com)
Do the same with pedals and cranks. Trek advises grabbing the pedals and crank arms to check for looseness, spinning the pedals to confirm they rotate freely, and not riding if the crank feels loose, sounds loose, or grinds when turned. Those are not cosmetic issues. They point to a fastening or bearing problem that can worsen quickly under commuting loads, especially when frequent stop-and-go riding means constant pedaling force and restarts. (media.trekbikes.com)
How often these checks should happen
- Before every ride: Do the 90-second Doorway Check. Manufacturers explicitly frame pre-ride inspection as an every-ride habit, not a once-a-week chore. (media.trekbikes.com)
- Once a week for most daily commuters: Check tire pressure with a gauge, inspect tread and sidewalls more closely, wipe and relube the chain if it is dry or dirty, and check accessory bolts and light charge. (media.trekbikes.com)
- After a flat repair, wheel removal, or accessory installation: Recheck wheel attachment, brake function, and the full pre-ride checklist before the next commute. (media.trekbikes.com)
- Any time use increases or conditions get worse: Increase maintenance frequency. Trek’s manual says maintenance schedules are based on normal use and should be performed more frequently when the bike is ridden more than the stated amount. (media.trekbikes.com)
Know when home maintenance stops being enough
A good commuter should be owner-checked, not owner-guessed. Trek says only a bike shop should adjust bearings, and it also warns that repairs or adjustments not specifically listed in the manual should be handled by the shop for safety. In practice, that means hub play, bottom-bracket grinding, significant wheel truing, brake problems beyond basic inspection, and any torque-critical or compatibility-sensitive repair deserve professional help. Regular self-checks are valuable precisely because they tell you when the job is no longer a quick home fix. (media.trekbikes.com)
Trek also advises an early inspection on new bikes because cables stretch with use, gives an example of a full check roughly two months after purchase, and recommends annual full service even for bikes that were not ridden much, with more frequent service for heavier use. A daily commuter usually falls into the heavy-use camp by definition. The practical standard is straightforward: use daily checks to stay safe this morning, and use periodic shop service to keep the whole system reliable next month. (media.trekbikes.com)
A reliable commuter bike is usually a checked commuter bike
The best commuter maintenance routine is not the most elaborate one. It is the one that fits real mornings and still catches the faults that matter. Tires, brakes, wheel security, drivetrain condition, and accessory attachment cover most of the problems that actually stop commutes or create risk in traffic. Learn the normal feel of your own bike, run the 90-second Doorway Check before each ride, and treat new noises or looseness as information, not background irritation. That small habit usually saves more time than it costs. (media.trekbikes.com)
Frequently asked questions
What tools are enough for most commuter bike checks at home?
For basic routine checks, a floor pump with a gauge, a clean rag, chain lube, tire levers, a spare tube or patch kit, and a small multi-tool cover a lot. Trek’s suggested tool list also includes a torque wrench, and SRAM publishes approved chain-wear tools for measuring chain elongation. Those two tools become especially useful once a commuter starts doing more of their own maintenance. (media.trekbikes.com)
Are these checks different for an e-bike?
The core checks are the same: tires, brakes, wheel security, drivetrain, cockpit, and accessories. The extra e-bike step is confirming that the battery is locked in place, charged, and that the remote or system is functioning properly. Trek includes those e-bike-specific checks directly in its pre-ride checklist. (media.trekbikes.com)
Can a rider ignore a little brake rub or chain noise until the weekend?
Sometimes, but only if the issue is clearly minor and the safety systems still work normally. A faint intermittent rub or a dry-but-intact chain may be a same-day maintenance job rather than a no-ride fault. A brake lever that reaches the bar, contaminated pads, a cracked rotor, serious skipping, repeated chain drop, or a loose crank should not wait. The safe habit is to separate annoying from unsafe before leaving, not while already in traffic. (media.trekbikes.com)
How often should a commuter bike see a professional mechanic?
Trek gives a useful baseline: have a new bike checked after its early break-in period, with an example of about two months after purchase, and get annual full service even if the bike was not ridden much. The same manual also says heavier use calls for more frequent maintenance. For a true daily commuter, that usually means being more proactive than the once-a-year minimum. (media.trekbikes.com)
Do lights really belong on a maintenance checklist?
Yes, especially for commuters. Trek’s checklist says front and rear lights should be secure, working properly, and supported by charged batteries, and it notes that reflectors are not a substitute for lights. Because commuters often ride in dawn, dusk, winter gloom, tunnels, or bad weather, a light check is part of bike readiness, not just gear management. (media.trekbikes.com)
References
- Trek Bikes – Electra Owner’s Manual (Rev 5, Jan 2025) – https://media.trekbikes.com/image/upload/v1736174277/EL_OwnersManual_EN-US_Rev5_Jan2025_WEB.pdf
- Giant Bicycles US – Getting Ready for Your Ride – https://www.giant-bicycles.com/us/get-started-riding
- Trek Bikes – How to Pump Bike Tires to the Right Pressure – https://www.trekbikes.com/us/en_US/how-to-pump-your-tires/
- SRAM – User Manual: Cassettes and Chains – https://www.sram.com/globalassets/document-hierarchy/user-manuals/sram-road/drivetrain/user-manual-cassettes-and-chains.pdf
- Shimano – User’s Manual: Hydraulic Disc Brake – https://si.shimano.com/en/pdfs/um/1XM0A/UM-1XM0A-002-ENG.pdf
- Shimano – Dealer’s Manual: General Operations – https://si.shimano.com/en/pdfs/dm/GN0001/DM-GN0001-26-ENG.pdf